Yesterday, I gathered all my supplies to make a lighted grapevine orb and didn't come out of my office until it was finished. It's a really simple project that takes about 45 minutes to make, maybe less if you're a great crafter. I can't take credit for such a creative idea, though. I saw this over at All Things Heart and Home.
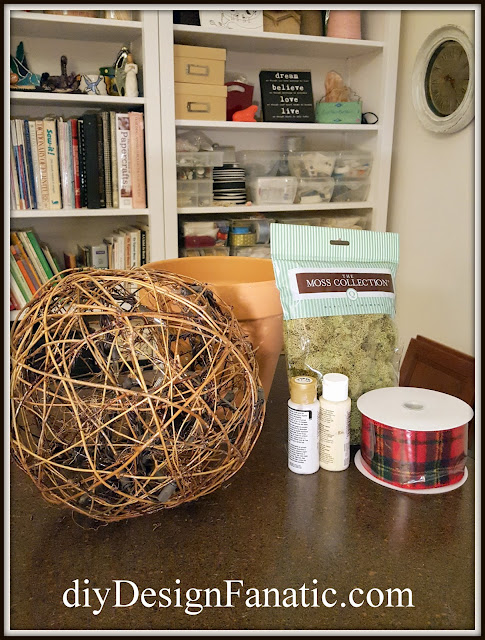
My supplies:
A 10" grapevine orb
1 String of mini lights (50 lights)
8" terra cotta pot
Reindeer Moss
Craft Paint
Spanish Moss (I used green)
Hot glue gun/glue stick
A paper bowl or 6" terra cotta saucer
Felt pads with adhesive
Ribbon (I ended up not using it)
You can buy an orb with lights already inside. If not, place the lights inside the orb and set aside.
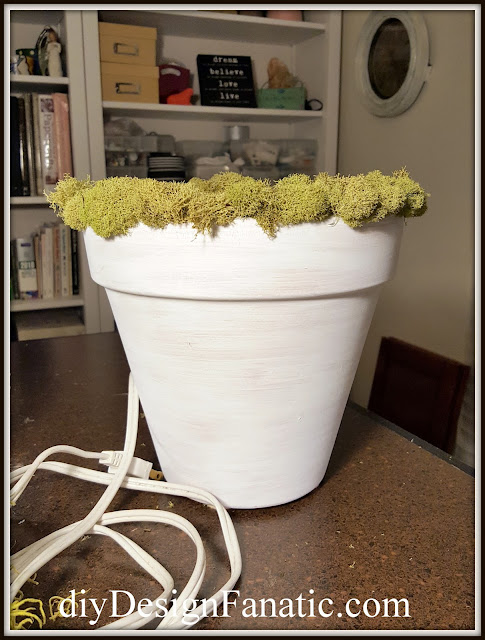
Next, paint your pot. I used a matte white acrylic, with a little cream added in. I may sand it a little to let more of the terra cotta show through later on.
Since the cord on my lights was short, I had to use an extension cord inside the pot. Robin over at All Things Heart and Home made the hole in the bottom of the pot larger. You can see how she did it HERE.
I added some felt pads to the bottom so that the pot would sit flat with the cord coming out.
I hot glued the moss to the top of the pot.
I used a large paper bowl, cut a hole in it large enough to put the end of cord through and set the bowl at near the top of the pot. The pot is tapered and keeps the bowl from falling further down into the pot. I may change this out to a terra cotta saucer.
I needed either the saucer or a bowl to keep the moss from falling onto the cord at the bottom.
Put the end of the cord through the bowl and through the bottom of the pot.
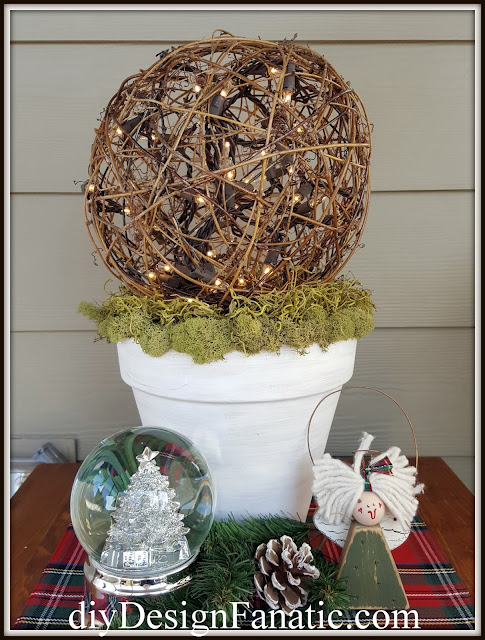
Holding the grapevine orb with one hand, cover the top op the paper bowl with moss, then set the orb on top of it.
The orb just sits on top.
You can add a festive bow, some mini pinecones to make it more Christmasy.
I set mine out in the screened porch on the Cat House/End Table that Mr. DIY made for our cat Buddy.
There you have it!
Hope you have as much fun making a Lighted Grapevine Orb as I did.
Pam


No comments:
Post a Comment
Leave a comment and let me know you stopped by! If you are not on blogger, leave me your email or some other way of getting in touch with you in the comment. That way I can reply to your question or comment.