Tuesday, September 27, 2016

More Garage Organizing

Hello friends,

Our 5th and final trailer/pod with storage, miscellaneous furniture and garage items was delivered this past Saturday.
It's nice to have everything under our roof, but now we have more unpacking to do. 
I'm so glad Mr. DIY installed his wall of cabinets first because he was able to unpack many of his tools and equipment right away. 
Half of the garage is filled with the totes we stored in our basement at the last house. Those will be stored in our high crawl space once it's encapsulated in a few weeks. 

Before our storage items arrived, Mr. DIY installed a rail organizing system for the ladders, step stools, laundry baskets and drying rack.


There are several rail type wall organizers out there, but we chose the Gladiator system from Lowe's because they had the hooks that would work for what we needed to store. 


Here's the wall before.


The system is pretty easy to install . Just screw it into the studs and put the end caps on.

Then clip in the hooks. 


 The hooks slide along the rail system so you can adjust them where you want them.


Here's how the wall looks now...


A fairly easy project that didn't take much time.

Mr. DIY has a workbench to build and will be adding a few more cabinets above it and the garage will be all finished.

If you missed the post on the beautiful wall of garage cabinets, you can find it HERE.


Hope you're having a good week!

Pam


ps: neither Lowe's or Gladiator compensated me for this post in any way.

Wednesday, September 21, 2016

Custom Closet Makeover


I can attest that a custom closet can save you time and money. Having custom closets in your home can also help it sell faster and may even increase the bottom line.
Wire closets, on the other hand...not so much.
They are probably at the top of my "have to change"  house list, even before laminate countertops or the dreaded popcorn ceiling. Thankfully, we have granite countertops and smoothe ceilings in this house.


We replaced the builder grade wire closets in our last house with custom melamine closets in all the bedrooms except the guest room. I designed custom closets at the time we purchased our last house, so our master bedroom closet was the first space we replaced.

Once you have a custom closet, it's difficult to go back to wire. An adjustable melamine closet is a much better use of space and the shelves are so much easier to clean.
Our master closet is too large of a project to do right now, so we decided to replace the closet in our daughter's room first.


custom closet, closet makeover, organization, organized closet, cottage, cottage style, farmhouse, farmhouse style, shoe storage, scarf storage

She did a great job organizing everything in her closet, but it wasn't ideal and didn't have any drawers like her last closet did. 
Here's her wire closet before:
custom closet, closet makeover, organization, organized closet, cottage, cottage style, farmhouse, farmhouse style

I looked at closets from various stores and decided on a melamine organizer from Martha Stewart Living on the Home Depot website. At the time I was looking, these were on sale and we had additional coupon. 


We ordered the ultimate closet kit for the hanging and drawers and
custom closet, closet makeover, organization, organized closet, cottage, cottage style, farmhouse, farmhouse style


a hanging closet starter kit for the shoe shelf section and a few extra shelf packs.
Martha Stewart offers a shoe shelf section with slanted shoe shelves(which we didn't want) and a shelf section with more shelves, but it was less expensive to order this unit and some extra shelves.
custom closet, closet makeover, organization, organized closet, cottage, cottage style, farmhouse, farmhouse style


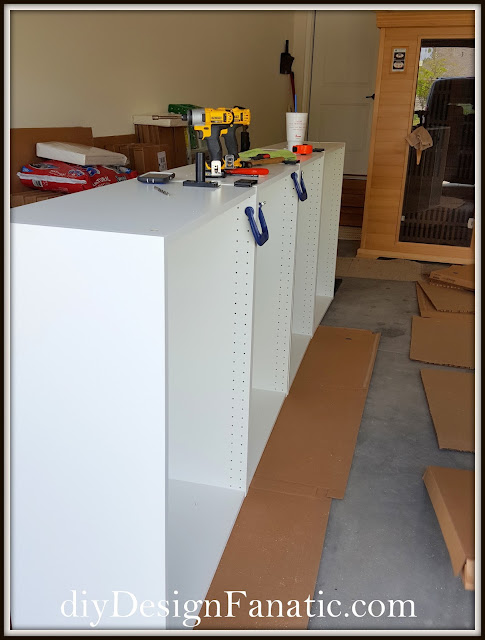
 Everything was taken out of the closet, the wire shelves removed, the holes patched and the walls painted the same color as the bedroom walls. This took most of a Saturday.
We cut the shoe shelves section down to 16 1/2" (from 24") to allow for the space needed for long and short hang. 16 1/2" was enough space needed for 2 pairs of shoes on each shelf.
custom closet, closet makeover, organization, organized closet, cottage, cottage style, farmhouse, farmhouse style, shoe storage, scarf storage

The closet system sections are hung on a rail and attached to the wall. Once those are installed, the drawers can be put in and the hanging rods installed. We installed the double hang about 41" apart- the top rod is installed a couple inches down from the shelf above. The long hang is installed at about 57" from the floor. This is where Mr. DIY finished on the first day. He installed the top shelves and cut down more shoe shelves the following day. Our daughter couldn't wait to put her clothes back in the closet!
custom closet, closet makeover, organization, organized closet, cottage, cottage style, farmhouse, farmhouse style, shoe storage, scarf storage


 The  rods and shelf were cut down to 33" wide making the total space for short hang 66".
custom closet, closet makeover, organization, organized closet, cottage, cottage style, farmhouse, farmhouse style, shoe storage, scarf storage

 The rod and shelf above was cut down to 21" wide for long hang.
custom closet, closet makeover, organization, organized closet, cottage, cottage style, farmhouse, farmhouse style, shoe storage, scarf storage


custom closet, closet makeover, organization, organized closet, cottage, cottage style, farmhouse, farmhouse style, shoe storage, scarf storage


The top drawer is shallow and perfect for holding jewelry.
custom closet, closet makeover, organization, organized closet, cottage, cottage style, farmhouse, farmhouse style, shoe storage, scarf storage

Our daughter brought the hooks she used at our previous house. We will also be installing a towel bar below to hold additional scarves.
custom closet, closet makeover, organization, organized closet, cottage, cottage style, farmhouse, farmhouse style, shoe storage, scarf storage


Here's the whole closet...
custom closet, closet makeover, organization, organized closet, cottage, cottage style, farmhouse, farmhouse style, shoe storage, scarf storage


I think we'll be adding another shelf above the drawers and I'd also like to figure out how to add another drawer to the bottom of the drawer section. (I know Mr. DIY can do it!)
custom closet, closet makeover, organization, organized closet, cottage, cottage style, farmhouse, farmhouse style, shoe storage, scarf storage


custom closet, closet makeover, organization, organized closet, cottage, cottage style, farmhouse, farmhouse style, shoe storage, scarf storage


So what's on your "have to change" list? Would love to know!


Pam

We spent a total of $541.67 as shown (with tax), and ordered another shelf pack for $24.59

Tuesday, September 13, 2016

Start An Herb Garden - In Your Front Yard

I just couldn't stand it anymore.
What, you ask?
Not growing anything.

Remember, the beautiful yard and garden at our last house?
There were raised beds filled with lettuce, broccoli, tomatoes and potatoes, a little herb garden, lots of flower beds, some woods and a winding path down to a creek.
It was lovely. 


What wasn't so lovely, was taking care of all that.
So we downsized both the house and the lot this summer.
We were so happy that we wouldn't have the big job of spreading 360 bags of mulch every Spring- snd we still are. 

But, it wasn't long until I missed walking outside and picking some fresh herbs when I made Italian meat sauce, especially when everyone seemed to be posting their beautiful fresh produce straight out of their gardens. 

Growing a few perennial herbs would be easy to grown and very little work, in just a little patch of dirt in our yard. Isn't that the way things start?

I just couldn't resist walking past some wonderful smelling herbs at Trader Joe's last week and came home with several of them.


At first,  I thought I'd start my herb garden in a corner of our backyard, but there were too many reasons not to. 

For one, the backyard is in a natural state without ANY plants or flower beds. There are a couple of builder trees planted next to the natural wooded area, but I didn't want to have to dig up the little herb garden when we did something with the backyard next year or in a couple of years.
 The front bed was perfect for some herbs, since it's not too big, gets a good amount of light and the afternoon sun is shaded by the house.
I resisted the urge to dig up all the plants and shrubs and start all over again.


The only plant I moved was one daylily.


The soil here is really rocky and I'm glad I didn't dig up all the plants. The little holes were difficult enough. Since the soil was so bad, I dug a larger hole than is normally needed and filled it with organic potting soil. Then I planted the herbs. This oregano smells so good and is a really pretty plant. It's a perennial plant and will stay green all year long.


 I planted a second, non variegated oregano next to it.


Rosemary grows a little taller and wider, so I planted it off to the side.

Thyme is another really pretty plant that takes little care and grows rather "tidily" I only had to trim it once a year and very little at our last house. It's a great herb for soups and looks pretty cut for small bouquets. I need to go back and get 2 or 4 more thyme plants  to make little row of them along the edge of the walkway.


The last herb I bought was dill. Dill is an annual plant, so I will have to take this one indoors before the first frost. All the other herbs are perennials.

The big box stores are having a $2 a bag on their mulch, so we went ahead and spread it since the old mulch was looking a little tired. This bed only took 11 bags - We're estimating that to do our whole yard currently will only take 32. That's a lot less than 360!


You could also start your herbs from seeds with a few items from Amazon:


The little front yard herb garden will have to suffice for my need to grow something -

for now.

Hope your week is off to a good start!

Pam


Friday, September 9, 2016

Garage Organization and Storage

As if Mr. DIY hasn't done enough work on our new house already, he's gone and started getting the garage organized...and he's proud of the way it turned out...
and he should be!

Now that the hall closets, linen closets and pantry are all organized, it was time to turn to the garage and get it organized and ready for delivery of the last 15 foot trailer/pod that's still in storage with our garage items, misc furniture and items we stored in the basement. We/He needed to do this project so that we would have space for garage items once they were delivered. With less space and lots of tools we definitely needed our garage to be organized.


Spending money on garage organization is well worth it when you have a small garage.

All of those items aren't going to be stored in the garage(permanently) as we have a high crawl space that we can stand up in (barely) where we will be storing the basement storage and all the garden/lawn equipment. We are having a company encapsulate the crawl space so that the humidity will be less than 55% and we'll be insulating it so the crawl space will stay cooler in the summer and warmer in the winter, almost as good as a basement. That's our goal, anyway.
storage, garage, garage cabinets, Ikea Sektion, Ikea, Cottage, Garage Organization


storage, garage, garage cabinets, Ikea Sektion, Ikea, Cottage, Garage Organization


Back to the garage...
As many of you know we've downsized and our former home had a large, 3 car garage. 
Where my car is in the photo to the far wall was "my" side of the garage which held the gardening items and the closed cabinet held items that we now mostly store in the laundry room.


storage, garage, garage cabinets, Ikea Sektion, Ikea, Cottage, Garage Organization


The 3rd bay of the garage held Mr. DIY's tools, and there were 3 tall cabinets that held paint, tools and work related items. We took those with us, but will be using them at the Mountain Cottage. If you'd like to see more how we organized our former garage, you can find it HERE.
storage, garage, garage cabinets, Ikea Sektion, Ikea, Cottage, Garage Organization

We gave away a lot of things we didn't need and wouldn't fit in our new small 2 car garage before we moved.

I came up with an overall general space plan and Mr. DIY planned out that he could fit most everything in a long wall of cabinets along one of the sides of the garage.  He will be adding more cabinets along the back wall once all of our storage has been delivered. 
storage, garage, garage cabinets, Ikea Sektion, Ikea, Cottage, Garage Organization, garage plan


He found that he could purchase the Sektion kitchen wall cabinets from Ikea and those would work better than him making the tall cabinets like he made for the last house. He made up his list and picked them up at Ikea.

The first thing he did was turn the bottom row of cabinets upside down and install the legs so the cabinets would be off the floor. That way, dust and debris could be blown or swept out easily.
storage, garage, garage cabinets, Ikea Sektion, Ikea, Cottage, Garage Organization
Add caption

He hung a rail so that the bottom row of cabinets could be attached to them. He hung it high enough so that the bottom of the cabinets would clear the little curb/foundation wall of the garage. The legs are adjustable and are really for added support. 
storage, garage, garage cabinets, Ikea Sektion, Ikea, Cottage, Garage Organization


Here's a partial bottom row installed. He continued all the way down to the end. Then he installed a second row of cabinets on another hanging rail on top of the bottom row, and then installed a third on top of that in the same way. Seriously, I don't know how he figures all this out, but I'm glad he does!
storage, garage, garage cabinets, Ikea Sektion, Ikea, Cottage, Garage Organization

 Here's a great pic of all the cabinets installed without the door.
storage, garage, garage cabinets, Ikea Sektion, Ikea, Cottage, Garage Organization

After he installed all of the cabinet, he started installing the doors.
storage, garage, garage cabinets, Ikea Sektion, Ikea, Cottage, Garage Organization

storage, garage, garage cabinets, Ikea Sektion, Ikea, Cottage, Garage Organization

He only installed cabinet boxes behind the garage door rail since it would prevent the doors from opening. After all the doors were on, he installed the door hardware using a template he purchased from Ikea. That template made installing the door pulls so much easier.
storage, garage, garage cabinets, Ikea Sektion, Ikea, Cottage, Garage Organization


 All finished!
storage, garage, garage cabinets, Ikea Sektion, Ikea, Cottage, Garage Organization


Here's what the cabinets look like with the doors closed. 


Aren't they pretty???

I'm so glad he chose cabinets with doors - it looks so much cleaner and the items stored inside the cabinets will stay cleaner too.
We are all ready for our 5th and final trailer/pod of storage to be delivered!
storage, garage, garage cabinets, Ikea Sektion, Ikea, Cottage, Garage Organization


We still have 2 more walls to organize in the garage. We'll be doing the left side this weekend, as well as starting on installing a customized closet in our daughter's room.
I know she can't wait for it to be finished!

Hope you have a great weekend!

Pam

Here are some details on our garage project:
He used Ikea Sektion cabinets
The bottom and top row of cabinets are 40" high x 30" wide x 15" deep (with doors)
The middle row of cabinets are 30" high x 30" wide x 15" deep
The whole wall of cabinets came to about $1,500
It took him a couple of weekends and several weeknights to install.


If you'd like to see another garage storage system Mr. DIY installed, you can find it HERE.