Back to the deck...
Usually, a deck is attached to the house outside the foundation. Our mountain house view porch deck is built over the foundation wall, which was always a problem when it rained because water would get in the crawl space. Plus, the boards on the porch were buckled up and difficult to walk on.
Usually, a deck is attached to the house outside the foundation. Our mountain house view porch deck is built over the foundation wall, which was always a problem when it rained because water would get in the crawl space. Plus, the boards on the porch were buckled up and difficult to walk on.
After Mr. DIY encapsulated the crawl space (you can see it HERE), he needed the deck to be waterproof. Mr. DIY had been looking at solutions for at least a couple of years. If the deck was made of wood, a drainage system had to be finagled below. We tossed "what about" solutions back and forth for a very long time.
Finally, he found Deckorators composite decking. They type of weather proof decking is Fastendry, similar to a product called Dexerdry, which was a new product for 2018, and chose the color Mesquite. Mr. DIY and I can't find the product on the Deckorator's website anymore, so I'm not sure if it's still available and we're so glad it was available when we needed it. We have not had any problem with water getting into the encapsulated crawl space.
Here's what he started with:
Sorry about the pic through the window...it's the only one I could find for a before. Thank goodness all those turkeys were in the yard and I took a pick of them.
The first thing to go were the rails.
Then, the deck boards were demo'd.
Here, you can see the encapsulated crawl space below.
Then the deck boards were installed.
Do you see the black flange on the edge of the board? That fits into the next board, creating a weather proof seal. It's brilliant
Do you see the black flange on the edge of the board? That fits into the next board, creating a weather proof seal. It's brilliant
The pic doesn't show the flange on the bottom because it has to be cut back at the end so it water doesn't wick up. Here's a better pic of the flange.
It was nice to get to this point and be able to sit on the view porch again, but without the rails, I felt like I was going to fall off!
Onto the stairs...
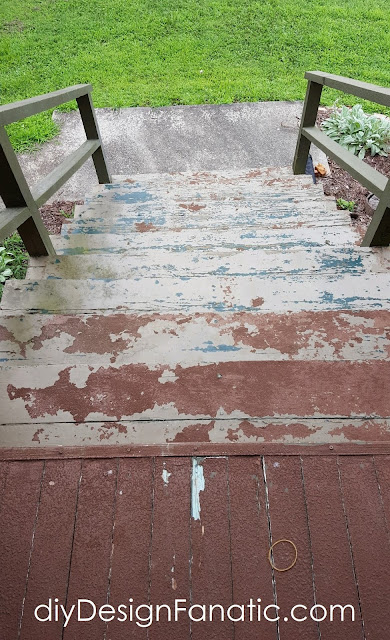
Here's how the stairs looked before:
Taking off the top stair revealed rot in the fascia board. The timing on replacing the stairs couldn't have been better.
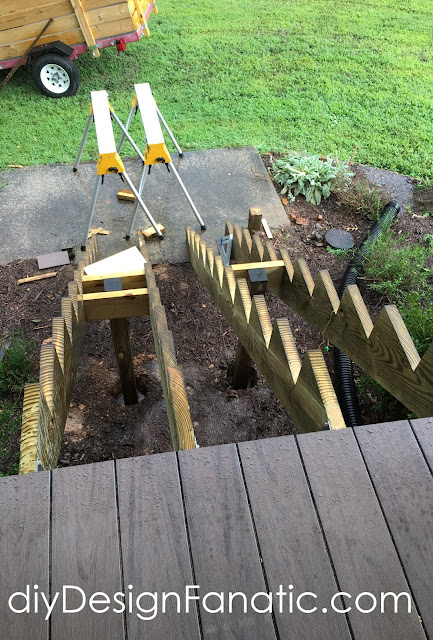
Once the stairs were demo'd, new stringers were added. The new stairs were going to be narrower because we thought it would look better because the house is so small.
This is how the porch and stairs stayed during the cold, Winter months.
Mr. DIY worked on the mini makeover in the downstairs bathroom.
Once the weather warmed up a bit, he took a week off and started working on the porch posts.
The posts are rough sawn cedar.
The posts are rough sawn cedar.
That's as far as he got the days he was at the mountain house. Mr. DIY didn't want to go any farther because he wanted to stain the rails before installing them. We took several weeks and decided to just go with a clear Thompson's WaterSeal. We can always stain them a color later.
Last week, Mr. DIY took a week off and worked on the porch and stair rails.
They had been stained and dried, which made it easy. We decided to go with metal balusters to give some contrast and so there would be less maintenance. The balusters are by Deckorators.
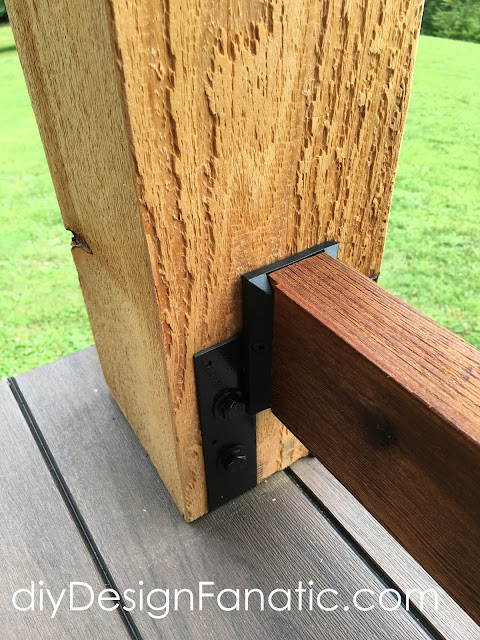
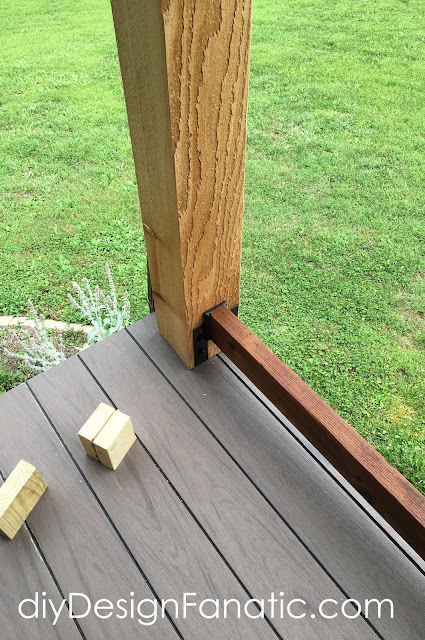
The next step was attaching the bottom deck rails to the house and to the posts with deck railing connectors (also by Deckorators)
Notice the circle of wood on the step below the deck rail. Mr. DIY cut a 6" circle with a flat edge cut on the bottom to make sure the bottom rail was within code.
(The space between the step and the rail has to be 6" or less.)
(The space between the step and the rail has to be 6" or less.)
The baluster connectors are spaced 4 1/2" on center for the rails on the porch and 5 1/2" on center for the angled rails on the stairs. 5 1/2" between the connectors on an angle, leaves a 4" space between the balusters.
Once the connectors were in on both the top an bottom rails, the balusters were popped on top of the bottom connectors. Then the top rail, with connectors installed were set on top of the balusters, connecting the entire rail. The top rail was toenailed screwed into the posts.
Bottom of the stair rail finished.
Aren't they pretty?
Mr. DIY still needs to seal all the posts, make the caps, finish the deck edge and touch up where the old stairs met the house, but those few things don't stop us from enjoying the view from our new porch!
Thanks so much for stopping by to see our deck project!
In a future post, I'll show you how the whole back side of the house looks with the new deck/porch and stairs from the lawn and after the porch is made into a comfy space.
Pam
Stop by to see the porch all decorated for summer HERE.
*We special ordered Fastendry from Lowes . It is a weather proof decking system with a hidden fastening system. We're not sure it's still available.
*we were not compensated in any way by Deckorators.
Disclaimer: The above post is about how we rebuilt our deck We don't take any responsibility for any errors or results obtained from using this information. Using power tools can result in injury. When using power tools, use safety equipment.
*we were not compensated in any way by Deckorators.
Disclaimer: The above post is about how we rebuilt our deck We don't take any responsibility for any errors or results obtained from using this information. Using power tools can result in injury. When using power tools, use safety equipment.


Wow big improvement! Mr. DIY is so handy and always does a great job. Looking forward to the full reveal!
ReplyDeleteThanks Liz! He really outdid himself with this project. It looks like a million bucks.
DeleteNow, we just have to spruce up the rest of the exterior!
I love your porch. Do you have a streetview picture? I would love to see how it looks from the front yard.
ReplyDeleteWe are about 300+ feet from the street and about 600 ft up the hill. Plus, our house doesn't face the street.
DeleteThe first pic in this link was taken from the driveway, about 2/3rd the way down the hill, but this is the way the house sits. The street is about 50 feet, dropping down about 30 feet in elevation. You can barely see the roof from the street. https://www.diydesignfanatic.com/2017/12/december-snow-at-mountain-cottage.html
Where did you order the rubber flange for the deck water proofing system?
ReplyDeleteDeckorators has Dexadry with the flange. https://www.deckorators.com/en/Inspiration/blog/2016/November/Introducing-Deckorators-Dexerdry#:~:text=Dexerdry%20is%20made%20of%20a,water%2Dtight%20seal%20between%20boards.
Delete