Showing posts with label wood project. Show all posts

Saturday, July 20, 2019

Simple 2 Seat Bench Made With Scrap Wood

Mr. DIY needed a new bench to replace the bench outside the woodshop at the mountain cottage.
mountain cottage,wood bench,  double chair bench, wood project


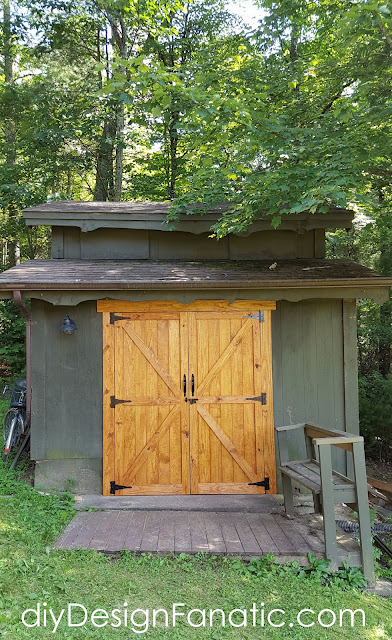
Last year, Mr. DIY made some new doors for his woodshop. They looked fabulous, but the crooked bench the previous owner made and the small wood patio was ready to  be replaced and upgraded.
Mr. DIY removed the bench and we found a great concrete guy to pour a new slab.

mountan cottage, woodshop doors, shed doors

I don't think I've ever seen a more beautiful slab of concrete!
mountain cottage, wood bench,  double chair bench, wood project

Back to the bench project...

Mr. DIY used that last bench to put things on and to take a rest on when he was building things.
The slab is the perfect size to put the table saw on and build whatever Mr. DIY happens to be working on. 

He found the bench he wanted to build at My Outdoor Plans. You can find the cut list and exact instructions HERE.  I'm just going to show you the steps.

As you know, Mr. DIY has built quite a few projects here at the mountain cottage and saves most of the larger pieces of scrap wood that he thinks he could use later. The smaller pieces end up in the burn pile. 

So, here's some pics of building the bench:

mountain cottage, wood bench,  2 seat bench, double chair bench, wood project


mountain cottage, 2 x 4 bench,  double chair bench, wood project

mountain cottage, wood bench,  double chair bench, wood project


mountain cottage, wood bench, 2 seat bench, double chair bench, wood project

mountain cottage, 2 seat bench,  double chair bench, wood project

mountain cottage, 2 seat bench,  double chair bench, wood project

mountain cottage, 2 x 4 bench,  double chair bench, wood project


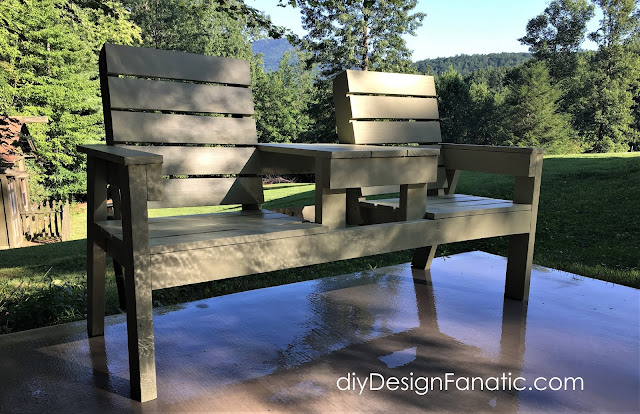
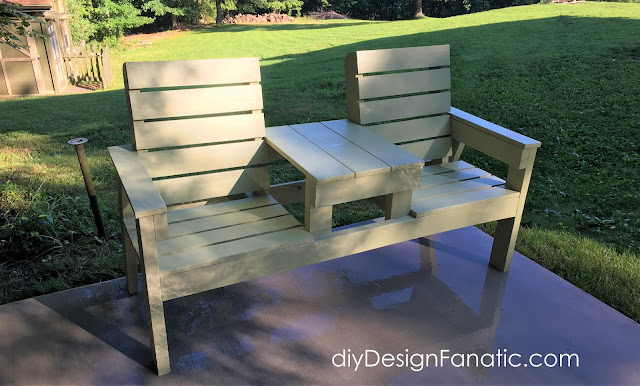
Here's how the bench looked when the construction was finished...
mountain cottage, 2 seat bench,  double chair bench, wood project

* as a side note: Mr. DIY said that if he were to make this bench again, he'd make each seat 4" wider and 2" deeper. 


Because the bench was made out of scrap wood with a screw holes (some pieces of wood were re-purposed), it needed to be painted. Since a few of the pieces were pressure treated wood, and paint can't be applied for at least 6 months, he used a tinted opaque stain, like you would use on a deck.

The color we used came out a little lighter than we wanted, but for now it's fine. 
We plan to paint the house and woodshop with a lighter green in a couple of years and at that time, we'll choose another color.

For now, it's perfect.


mountain cottage, 2 seat bench,  double chair bench, wood project

mountain cottage, 2 seat bench,  double chair bench, wood project

mountain cottage, 2 seat bench,  double chair bench, wood project

Here's the BEFORE:
shop doors, shed doors, woodshop doors

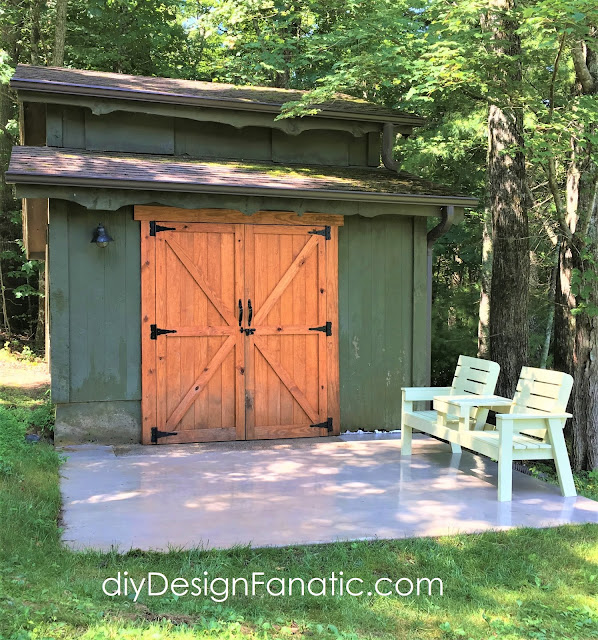
And, here's the AFTER:
mountain cottage, 2 seat bench,  double chair bench, wood project


mountain cottage, 2 seat bench,  double chair bench, wood project


Another project checked off the list!
Mr. DIY is still working on finishing the last details on the view porch deck and stairs. Hopefully, we'll be able to show you that soon.

Thanks for stopping by,

Pam
Disclaimer: The above post is about how we built our bench. We don't take any responsibility for any errors or results obtained from using this information. Using power tools can result in injury. When using power tools, use safety equipment.

Monday, October 30, 2017

Making Wood Rounds


Jenny's friend Emily was planning her wedding over the summer and wanted some wood rounds for the centerpieces on the tables for the guests. 
wood rounds, mountain cottage, trees, cottage, cottage style, farmhouse, farmhouse style, diy, diyDesignFanatic.com

I looked high and low for her, desperately trying to find some inexpensive options online and in stores. I found these in HomeGoods, but they were a little pricey at 19.99. X 20 tables and it was a no go.
wood rounds, mountain cottage, trees, cottage, cottage style, farmhouse, farmhouse style, diy, diyDesignFanatic.com

Emily and Jenny thought we might be able to cut some rounds out of the large pile of huge, unsplit oak logs  at our mountain cottage, but most of the logs we had cut were missing the bark.

There are several smaller trees on our property that need to be cut down because in a few years. they'll block our much loved view.  We thought one of the tree trunks might be large enough in diameter and could be cut up in rounds. We hadn't planned on cutting down the trees, though, until the Winter after the leaves had fallen and most likely, not until next year. 

I wasn't sure we'd have enough time to fit that into the list of projects we needed to do, but Tim thought if Jenny, Emily and Aaron (Emily's fiancee) went up and helped him, they could get it all done that day.


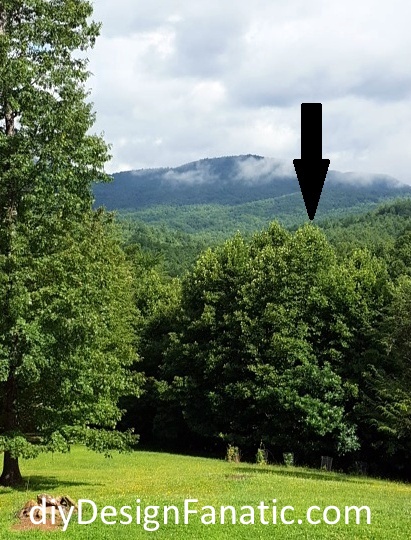
Here's a pic of the trees that needed to take down. We thought that one of those trees was large enough to be cut up as rounds.They chose the tree below the arrow. It was a Poplar tree about 50-60 feet tall and only a few years old. Poplar trees grow FAST!
wood rounds, mountain cottage, trees, cottage, cottage style, farmhouse, farmhouse style, diy, diyDesignFanatic.com

Here's how it looks after the tree was cut down. Mr. DIY met Jenny and her friends at the Mountain Cottage on a Saturday and were able to get the job done. It was easy enough to cut the tree down, but getting the logs up the hill to the wood pile next to the driveway, took teamwork. Mr. DIY said he couldn't have gotten it done on one Saturday without their help. 
wood rounds, mountain cottage, trees, cottage, cottage style, farmhouse, farmhouse style, diy, diyDesignFanatic.com


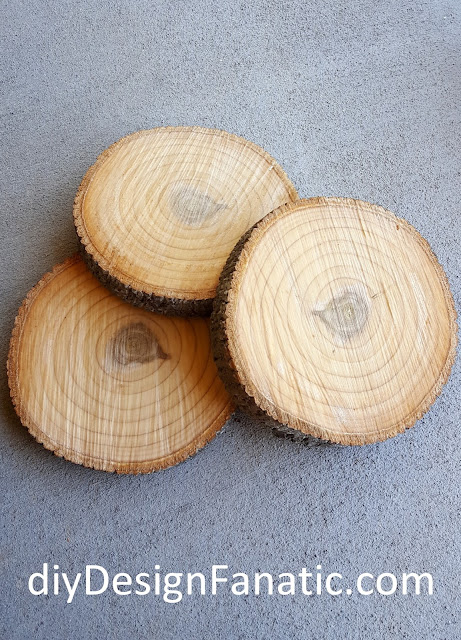
Mr. DIY gave the larger rounds to Emily and Aaron for their wedding and brought home 5 of the smaller ones to me. I was thrilled. Here's how the rounds looked when he brought them home. They were pretty wet and the rounds were rough since they had only been cut with a chainsaw.
wood rounds, mountain cottage, trees, cottage, cottage style, farmhouse, farmhouse style, diy, diyDesignFanatic.com


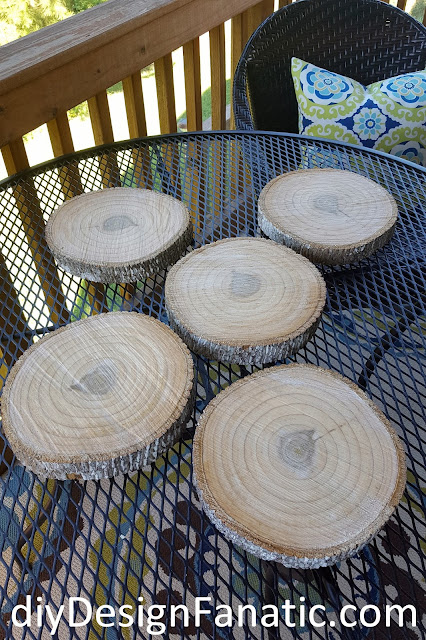
I set them outside on the table on the screened porch. It was pretty humid over the summer and thought they would dry out slowly.
wood rounds, mountain cottage, trees, cottage, cottage style, farmhouse, farmhouse style, diy, diyDesignFanatic.com


Looking back, I would have stacked them up like this and wrapping them in muslin fabric so they would dry more slowly. You'll see in the next photo that the rounds cracked. I still like them though...
wood rounds, mountain cottage, trees, cottage, cottage style, farmhouse, farmhouse style, diy, diyDesignFanatic.com


Mr. DIY sanded the rounds down for me with a belt sander.  Note to self: do this outside and not in the garage! Dust was everywhere after sanding the first wood round! He sanded the rest outside in the backyard.  I left my wood rounds unfinished, but I might apply some poly in the near future.
wood rounds, mountain cottage, trees, cottage, cottage style, farmhouse, farmhouse style, diy, diyDesignFanatic.com

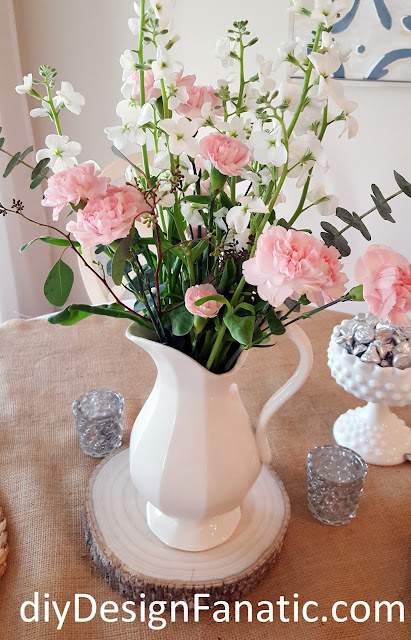
I used mine for Emily's shower that Jenny hosted at our house. You can see more about the shower HERE:
wood rounds, mountain cottage, trees, cottage, cottage style, farmhouse, farmhouse style, diy, diyDesignFanatic.com

I continue to use the rounds for decoration. Here, you barely see the round, but it raises the green plant to just the right height.
wood rounds, mountain cottage, trees, cottage, cottage style, farmhouse, farmhouse style


Thanks for stopping by!

Pam

Saturday, August 1, 2015

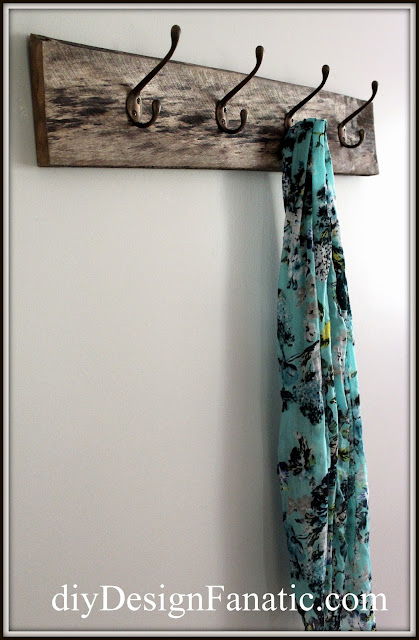
Reclaimed Wood Coat Rack

We're still plugging along doing little projects to get the house ready for sale. We're resigned to the fact that it's going to take us most likely until next Spring; which is ok with us.
This weekend, we're working on prepping the boards to install a planked ceiling at the kitchen at the mountain cottage, but in between coats of primer and paint, Mr. DIY did a little project for me.
reclaimed wood coat rack, reclaimed wood, coat rack, farmhouse, farmhouse style, cottage, cottage style, diyDesignFanatic.com


Wednesday, September 3, 2014

Pottery Barn Knockoff Storage Bed


*This post contains affiliate links


 I'm so excited to FINALLY show you the Pottery Barn inspired storage bed we made for the upstairs bedroom at the mountain cottage. I've said before that one of our main goals at our small mountain house is to increase storage in every room. Storage is paramount when choosing furniture, as well.
The bed we would choose for the bedrooms was no different. 
It HAD to have storage. 
If you're like me, you can never have enough storage!
Pottery Barn, Stratton Bed, storage bed, bed, storage, cottage, farmhouse, farmhouse style


Tuesday, August 5, 2014

Painted Vintage Style Wood Stool

Remember last month  Mr. DIY made me a cute wood stool. Our daughter really liked it, so I gave that one to her and Mr. DIY made me another one. 
I had him change up a few of the dimensions  on the second stool. 


The inspiration for my stool came from this cute one I found on Etsy.
Old Stuff Love on Etsy

This was the first stool Mr. DIY made for me. 
 If you would like to see how we made the stool, you can see it HERE.


The second stool has  two difference from the first one; the skirt on the new one is  1 1/2" high instead of 2" and the legs were moved out a half an inch more on either side.  


 I mixed up some black and light grey paint I already had.

Both stools were made from scrap wood we had in the garage. I'm hoping we have more scrap wood in the garage because I could use a few more of these.

Do you use stools around your house? 
(I'm only 5ft 4" tall and I seem to always need one.) 

Pam

joining:
Power Of Paint

Monday, July 28, 2014

DIY Pottery Barn Inspired Medicine Cabinet

Well,  the worlds smallest half bath at the mountain cottage is fully functional! 

YAY!!!

Mr. DIY installed the sink, countertop and faucet last week and the little bathroom is open for business. 
(no pun intended)

There are a few more details that need to be finished up, so I can't show you the whole bathroom just yet. The wood apron on the underside of the countertop, a fabric skirt needs to be made and hung  and a doorway needs to be painted. 
In the meantime, I can show you an awesome storage detail I designed (and painted and stained) and Mr. DIY constructed... 


...a custom framed medicine cabinet...
custom medicine cabinet, Mountain cottage, mountain cottage upstairs bathroom, wood project, Building project, diyDesignFanatic.com


Adding storage to every room is one of our highest priorities as we renovate the Mountain Cottage.
I figured we could build a deep medicine cabinet set into the wall and make it pretty with a stained framed mirrored door. 

Our inspiration came from Pottery Barn
custom medicine cabinet, Mountain cottage, mountain cottage upstairs bathroom, wood project, Building project, diyDesignFanatic.com

(This mirror is no longer available)


Mr. DIY started out using the table saw to make the frame for the mirror out of   1 x 4's. The wood was trimmed down to 3" wide. 
Grooves( a dado) were cut around the frame - allowing the mirror to sit flush in the framed door
Pottery Barn inspired,  medicine cabinet, rustic, farmhouse style, farmhouse, cottage, cottage style, diy

Pottery Barn inspired,  medicine cabinet, rustic, farmhouse style, farmhouse, cottage, cottage style, diy

4 pieces of wood were put together to make the frame for the mirror using screws in pocket holes make with the Kreg Jig. 


Then the mirror was glued in place using construction adhesive.
Pottery Barn inspired,  medicine cabinet, rustic, farmhouse style, farmhouse, cottage, cottage style, diy


The adhesive was smoothed out with a putty knife so that the hardboard would fit in the groove and tightly against the mirror. 

Pottery Barn inspired,  medicine cabinet, rustic, farmhouse style, farmhouse, cottage, cottage style, diy


The Kreg jig was used to create pocket holes so that  the four sides could be screwed together Construction adhesive was used to to glue the mirror into  the frame frame and then to attach hardboard to strengthen and protect mirror
Pottery Barn inspired,  medicine cabinet, rustic, farmhouse style, farmhouse, cottage, cottage style, diy


Here's how the back of the framed mirror looked at this point. 
Pottery Barn inspired,  medicine cabinet, rustic, farmhouse style, farmhouse, cottage, cottage style, diy


The box is just 4 pieces of 1 x 6" cut down to 5" deep.  The Kreg Shelf Pin Jig was used to make holes so that the shelves could be adjustable. 
Pottery Barn inspired,  medicine cabinet, rustic, farmhouse style, farmhouse, cottage, cottage style, diy
You can find the Kreg Shelf Pin Jig HERE


Pottery Barn inspired,  medicine cabinet, rustic, farmhouse style, farmhouse, cottage, cottage style, diy


Here's the medicine cabinet box after a hardboard back had been put in. You can see the shelf pin holes drilled in the sides. The box was primed and painted with several coats of white paint
Pottery Barn inspired,  medicine cabinet, rustic, farmhouse style, farmhouse, cottage, cottage style, diy

The framed mirror door is ready to be stained and the back painted. 
Pottery Barn inspired,  medicine cabinet, rustic, farmhouse style, farmhouse, cottage, cottage style, diy


We found a can of MinWax Provincial stain in the workshop at the mountain cottage and I applied several coats to the frame of the mirror. 
Pottery Barn inspired,  medicine cabinet, rustic, farmhouse style, farmhouse, cottage, cottage style, diy


I thought the stain wasn't quite right next to the countertop, so I bought a can of Rust-oleum Driftwood stain and applied a couple of light coats on top of the Provincial stain. 
It was perfect!
A couple of coats of clear poly was applied over the stain. 
Pottery Barn inspired,  medicine cabinet, rustic, farmhouse style, farmhouse, cottage, cottage style, diy


We didn't like the look of the back of the door because of the gap between the hardboard and the frame and the pocket holes at the top an the bottom,
Pottery Barn inspired,  medicine cabinet, rustic, farmhouse style, farmhouse, cottage, cottage style, diy


 so Mr. DIY found some wood scraps in the woodshed at the mountain cottage and glued them onto the back of the door. I stained the pieces of wood after they were attached. 
Pottery Barn inspired,  medicine cabinet, rustic, farmhouse style, farmhouse, cottage, cottage style, diy

Here's the finished product!
Pottery Barn inspired,  medicine cabinet, rustic, farmhouse style, farmhouse, cottage, cottage style, diy
You can't tell from the photo, but the Provincial stain come through in the knots in the wood and is the color the countertop is stained. (If you follow me on Facebook or Instagram, you've seen how beautiful it turned out)


The door is attached with two 12" x 3/4" piano hinges
The medicine cabinet box is 22 wide x 28 high x 5" deep. 
That's 2.77 square feet of storage!

Pottery Barn inspired,  building project, medicine cabinet, rustic, farmhouse style, farmhouse, cottage, cottage style, diy

Mr. DIY attached a magnetic catch in the lower left corner of the inside of the medicine cabinet.
Pottery Barn inspired,  building project, medicine cabinet, rustic, farmhouse style, farmhouse, cottage, cottage style, diy


Pottery Barn inspired, building projects,  medicine cabinet, rustic, farmhouse style, farmhouse, cottage, cottage style, diy

Our diy Pottery Barn Medicine Cabinet adds a good amount of storage in an otherwise wasted space.

What is one room in your house that could use more storage space???


Pam