The basement painting is finished! Well, everything but the outside door is anyway.
We felt the need to lighten things up, as basements, even walkout basements like ours, need all the light they can get. I even put a couple of thin coats of grey on the previously black lanterns to lighten things up.
The basement paint before wasn't too dark, but all that brown just made things, well dark. Everything just blended in.
Showing posts with label basement family room. Show all posts
Wednesday, June 24, 2015
Friday, January 30, 2015
Planning For Resale
We are planning for to put our house up for sale soon and have a few makeovers to do around our house. We've been planning on downsizing for several years and we think it might as well be this year sometime.
The first room is we need to work on is our master bath. Our house being nearly 15 years, old could use a few updates. We will paint and redo the shower surround with tile and have a frameless glass door installed.We haven't quite nailed down exactly what colors and materials yet, but I sure do love the little glass and stone rectangular mosaic tiles we found at Lowe's.
Here's what the bathroom looks like now, with a few years of wear and tear on it. That brass framed shower has got to go as it has seen better days. Besides new tile in the shower, we plan on replacing the faucets, showerhead and vanity light. The Master Bathroom will be our biggest expense.
Our Master Bedroom needs new paint too. The dark brown paint is showing wear, scuff marks, chips, etc., and it's time for a fresh color.
Quite a few diy Design Fanatic Facebook followers loved this color in my mock up. I think we will paint the Master Bedroom a light neutral greige and leave the color for the adjoining bathroom.
Last week I showed you how we replaced the broken blinds with these Roman Shades and inexpensive Vivan curtains from Ikea. Nothing else needs to be done in here since we just updated the paint a few years ago.
We've also gave the laundry room a little update, as well. We've painted the room with Rainwashed by Sherwin Williams but still plan on painting the cabinets with Annie Sloan chalk paint.
I thought it would be good to update our Guest Room since it's the first bedroom a buyer will see once upstairs. The paint still looks good, but we plan to lighten things up by changing out the furniture and add some Vivan curtains instead of the black ones. I figured that if we sell the existing furniture, which we found at an estate sale and Craigslist and use some existing furniture we have in other parts of the house, this makeover will bring in $400 when we sell the furniture!
Sounds pretty good to me! (if you deduct what we paid for the furniture, curtains and supplies, the net amount might be closer to $0, but at least the sale of the items will cover the cost of the reno)
The last space we would like to paint is the basement Family Room and Bathroom. Basements can always benefit from lighter and brighter paint, even if it is a walk out basement with lots of windows. We may or may not get to this room.
Along with all the painting and redecorating, Mr. DIY is caulking all the windows. making repairs and replacing a few window sashes. The list is LONG! Of course, we won't be doing all of these projects ourselves and will be hiring others to help us out.
While we're doing all of this, we will be working on the kitchen reno at the Mountain Cottage, which we are starting this weekend. I'm pretty sure this reno is going to take many months, especially with all that needs to be done at our home.
I guess that's our project list for the year, until, of course, we find another house that needs some work!
The first room is we need to work on is our master bath. Our house being nearly 15 years, old could use a few updates. We will paint and redo the shower surround with tile and have a frameless glass door installed.We haven't quite nailed down exactly what colors and materials yet, but I sure do love the little glass and stone rectangular mosaic tiles we found at Lowe's.
Here's what the bathroom looks like now, with a few years of wear and tear on it. That brass framed shower has got to go as it has seen better days. Besides new tile in the shower, we plan on replacing the faucets, showerhead and vanity light. The Master Bathroom will be our biggest expense.
Our Master Bedroom needs new paint too. The dark brown paint is showing wear, scuff marks, chips, etc., and it's time for a fresh color.
Quite a few diy Design Fanatic Facebook followers loved this color in my mock up. I think we will paint the Master Bedroom a light neutral greige and leave the color for the adjoining bathroom.
Last week I showed you how we replaced the broken blinds with these Roman Shades and inexpensive Vivan curtains from Ikea. Nothing else needs to be done in here since we just updated the paint a few years ago.
We've also gave the laundry room a little update, as well. We've painted the room with Rainwashed by Sherwin Williams but still plan on painting the cabinets with Annie Sloan chalk paint.
I thought it would be good to update our Guest Room since it's the first bedroom a buyer will see once upstairs. The paint still looks good, but we plan to lighten things up by changing out the furniture and add some Vivan curtains instead of the black ones. I figured that if we sell the existing furniture, which we found at an estate sale and Craigslist and use some existing furniture we have in other parts of the house, this makeover will bring in $400 when we sell the furniture!
Sounds pretty good to me! (if you deduct what we paid for the furniture, curtains and supplies, the net amount might be closer to $0, but at least the sale of the items will cover the cost of the reno)
The last space we would like to paint is the basement Family Room and Bathroom. Basements can always benefit from lighter and brighter paint, even if it is a walk out basement with lots of windows. We may or may not get to this room.
Along with all the painting and redecorating, Mr. DIY is caulking all the windows. making repairs and replacing a few window sashes. The list is LONG! Of course, we won't be doing all of these projects ourselves and will be hiring others to help us out.
While we're doing all of this, we will be working on the kitchen reno at the Mountain Cottage, which we are starting this weekend. I'm pretty sure this reno is going to take many months, especially with all that needs to be done at our home.
I guess that's our project list for the year, until, of course, we find another house that needs some work!
Pam
Monday, January 7, 2013
DIY Barn Doors
I'm finally going to share how we made the barn doors for our basement Family Room.
I've always thought barn doors were awesome and wanted to put them somewhere in our house, but didn't know where. It finally hit me that barn doors over the existing patio doors in the basement would serve two purposes; the first being for privacy and second for security. The barn doors fit over the existing blinds that we have installed on the patio doors, but I am thinking of taking them off because no sun ever hits the windows due to the deck covering the patio just outside.
Mr. Fanatic bought galvanized barn door hardware at Tractor Supply and I spray painted the pieces an oil rubbed bronze, which is almost black.
Here are the 8ft unpainted galvanized box rails.
Mr. Fanatic marked the studs in the wall with tape.
He then marked where the studs were on the pine 2 x 8 for the left side and then on a 2 x 8 for the right side. The two 2 x 8's were used as a header to hang the rail for the doors on. After marking the headers, Mr. F pre-drilled holes in them.
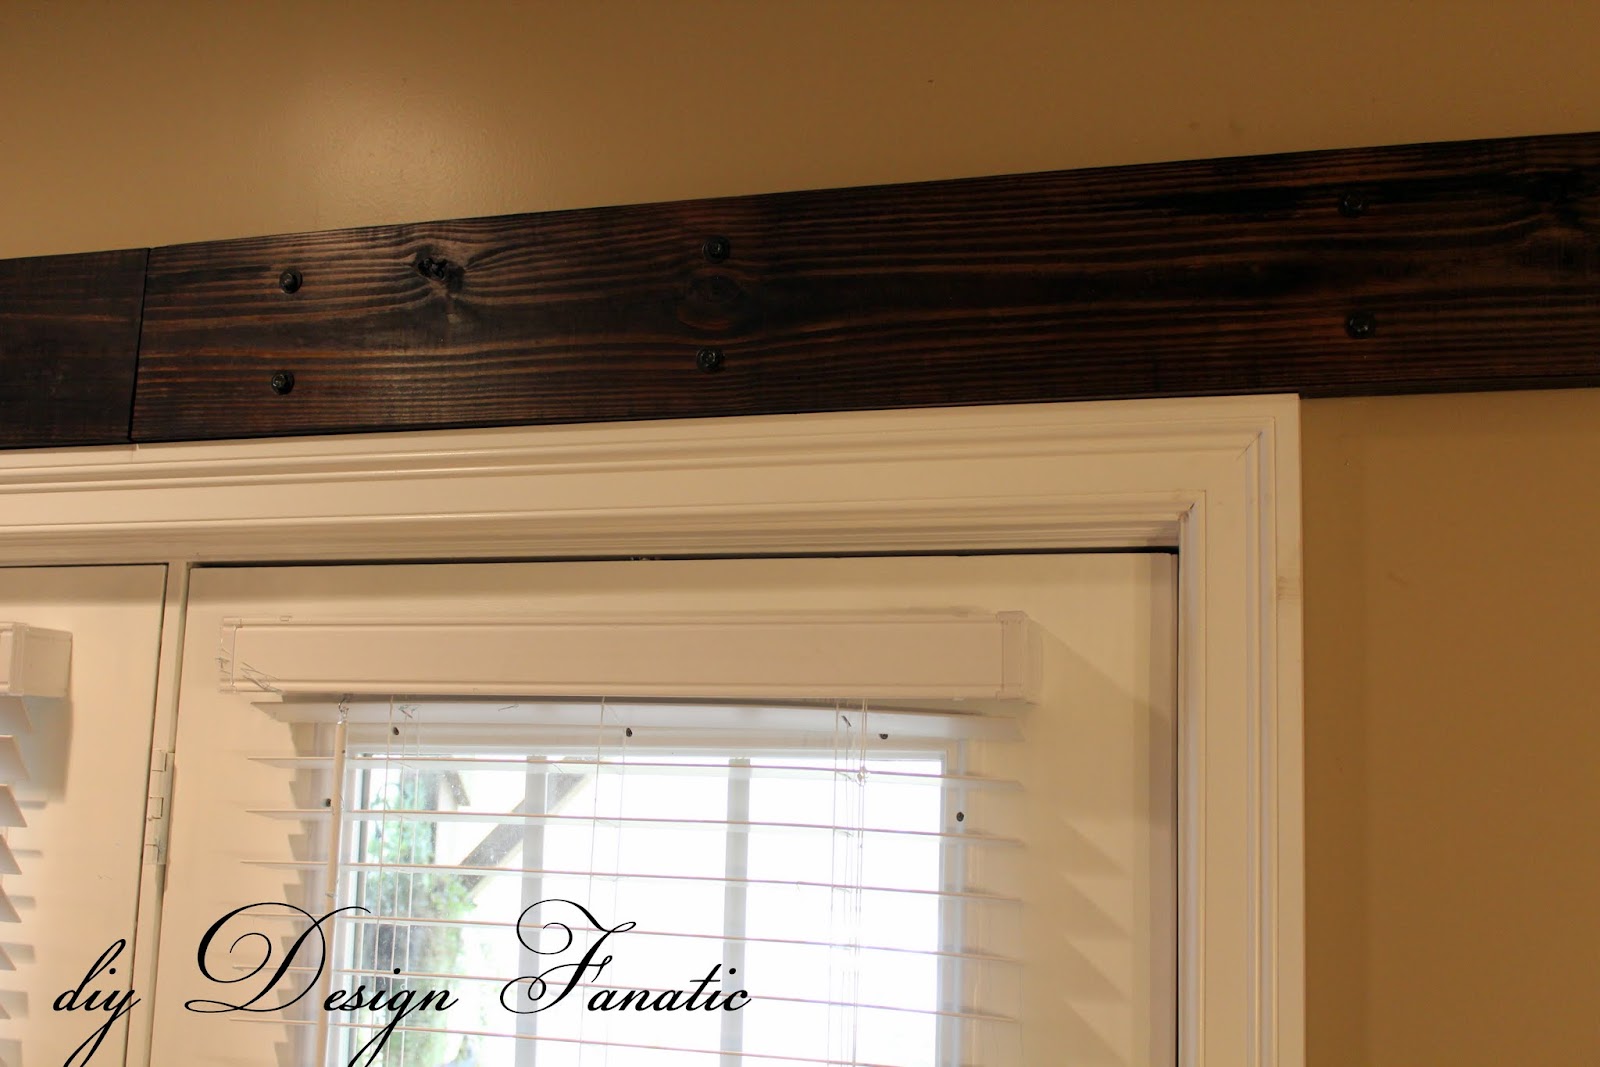
I stained the two headers with oil based Jacobean stain by Minwax. You can see the pre-drilled holes in the header.
After the stain was dry, Mr. F installed the header. I knew as soon as the header went up that the barn doors were going to look great.
He attached the header to the studs with 1/2" diameter x 5" lag screws (with washers)
He attached a small piece of 2 x 4 (that was my stain sample) to test out how to adjust the hangers.
To make the doors, Mr. Fanatic used eight 2 x 6's, which are roughly each 5 1/2" each, making each door 44". (Each door covers the exterior door plus the width of the width of the molding and the center frame between the two doors).
The eight 2 x 6's were clamped together with pipe clamps and sanded down.
Since 2 x 6's are not all perfect, Mr. F hammered them down so they wouldn't stick up quite so much. He used a wood block so the hammer wouldn't leave marks.
After that, he measured the height that he wanted for the door, then cut the door to length.
He then layed out the 1 x 4's that would hold the boards together. We chose a Z pattern.
Mr. F used 1 1/2" torx drive screws to hold the boards together.
Once the first door was made, Mr. F. hung the door to make sure it would all work.
After Mr. F made the 2nd door, I stained the first coat on the first side. You can see the 2nd door on the pool table.
I stained each side with two coats of stain and let the stain dry 2 days between each coat. I did the same for the other sides of the doors.
Mr.F had to change out the cable connector to one that turned 90 degrees and the plugs on the TV to flat plugs (on the left side of the doors and lamp on the right side of the door) in order for the barn doors to open while everything was plugged in.
Mr. Fanatic still has to the handles, slide bolts, guides, and will add stops to the ends of the rails.
Can't wait to get the handles on.
In the meantime, we can still enjoy the barn doors.
I think they really make the room.
Here's the before:
And After:
Mr. F's next projects include making some coordinating shutters for the little window next to the fireplace and a heavier door to the unfinished part of the basement.
The projects list for 2013 is getting longer.
Pam
ps: just in case you're wondering, we spent approximately $650 on the doors and all hardware...$550 for what is shown in the last photo. (yep, we splurged on the handles and gate latches & they're bee u tee ful!)
Disclaimer: The above post is how we made our barn doors. I don't take any responsibility for any errors or results obtained from using this information. When using power tools, use safety equipment.
ps: just in case you're wondering, we spent approximately $650 on the doors and all hardware...$550 for what is shown in the last photo. (yep, we splurged on the handles and gate latches & they're bee u tee ful!)
UPDATE: if you'd like to see the fancy hardware we put on the Barn Doors, click here.
We purchased 2 of these from Amazon if you're wondering where to get them:
.
Disclaimer: The above post is how we made our barn doors. I don't take any responsibility for any errors or results obtained from using this information. When using power tools, use safety equipment.
If you order from Amazon by clicking the link, I will make a commision on them.
Wednesday, October 10, 2012
Next Project: Barn Door Shutters
I've been pining for barn doors for some time now.
Mr. Fanatic has Pinterest to thank for that, as I've been perusing and pinning all sorts of barn doors for months.
At first I wasn't sure where we were going to put them, I just wanted to make some and was determined to put them somewhere in our house.
Then it hit me...
What about making barn doors into shutters to cover the glass patio doors in our basement Family Room?
The barn doors would be perfect to provide privacy, to make the room dark when watching a movie and to add a layer of security to our basement.
There are so many awesome barn doors on Pinterest and we plan do do a simple Z design with either 2 x 6 or 2 x 8 lumber stained dark with some inexpensive galvanized hardware like the one in this photo. Mr. Fanatic thinks we should use 2 x 8's(less work and cost) and I think 2 x 6's would look better (scale wise).
![]() |
| C Designs DecorPad.com |
Here's a simple drawing of what we intend to do. I would also like to make a little shutter for the window to the right of the fireplace.(When I say "I", it means Mr. Fanatic...lol)
Since the door will be stained dark, it presents another problem.
(You know, one thing always leads to another)
I think the room will be too dark and will look better and brighter in a much lighter color...A light grey perhaps?
Mr. Fanatic took a week off and is finishing up another project.
Today he told me of his plans to start the doors this week. I think it's a little optimistic of him to think he will.
He's currently working on a drop ceiling for a storage room in our basement and it will take him at least a whole day to finish it. After that, he plans on making some simple shelving for the storage room.
Also, yesterday he bought one of those solar tube skylights for the upstairs bathroom. Oh, did I mention this tube has to be done on Thursday because we're getting our roof redone?
![]() |
| Velux.com |
The upstairs bath is going to look great with more natural light.
Can't wait.
So many projects...so little time.
What's on your project list? Would love to know.
Pam
Subscribe to:
Posts (Atom)