Showing posts with label Pantry. Show all posts

Friday, March 31, 2017

Mountain Cottage Reno - Kitchen Update

Renovating a kitchen takes a lot of time, especially if there are a lot of little projects in the design . That's definitely the case with our project. 


The kitchen at our Mountain Cottage has come a long way since it first look like this...
Open shelves, wood countertops, kitchen reno, mountain cottage, cottage style, cottage kitchen, farmhouse style, farmhouse, white kitchen, subway tile
and the above photo was taken after work began! 

Monday, December 26, 2016

Projects Of 2016

I hope you had a wonderful Christmas celebration yesterday with your family and friends!

The last week of the year is a good time to reflect on all the blessings that you've enjoyed and how far you've come.
When I look back at all we've accomplished this year, it amazing to me and it's only by the grace of God that we've accomplished it all. 

The first half of the year was spent getting our (previous) house in near perfect condition, staged and ready to sell. In 2015, we  anticipated putting the house on the market in May, so we had already started with lightening up the paint in the basement, master bedroom, laundry room and  office. In January of this year, things went into high gear and I worked nearly every day until May sanding and painting nearly all of the trim in the house, repainting the deck and just making everything look brand new. Mr. DIY  bought supplies on the way home from work and there was something to do every night. Getting a big house ready to sell is hard work. 

One big project Mr. DIY worked on was the Master Bath shower tile surround and repainting the Master Bathroom. I love how the frameless shower turned out and it was so easy to clean. 

We didn't neglect the outside of the house. I painted the front door and sidelights, as well as the shutters on the house and Mr. DIY painted the front porch posts. 
The front porch was staged with flowering plants, pillows a new front door mat, and a newly painted basket on the front door. 


When the professional photographer arrived in May, we were exhausted! Nearly every surface was touched up to look fresh, clean and updated. All our work paid off when we received multiple offers after two days of showings.
Brian Stogner

One of the most stressful projects of the year was packing up and moving. The stress of not knowing what would fit in our new downsized house and getting and moving out of a house you've lived in for 16 years and only having 45 days was overwhelming.

I wrote about our crazy, stressful move and gave you a peek at our new house.


Finding a house in just a couple of weeks that fit all of our needs and in the budget wasn't easy. We had put in an offer the previous day on another house when we viewed our current house and quickly rescinded that offer. I'm so glad because that house was a huge fixer and this one was only 2 years old. We were starting off with a clean slate, still a lot to do, but  it is mainly cosmetic, painting and organizing the closets.


The painting in our daughter's room started the day we took posession of our house and before our furniture arrived the next day. Mr. DIY installed cabinets in the laundry room the day the first week after we moved in. I haven't done a blog post on her room yet or the laundry room,  but thought they should be included.

Mr. DIY got busy right away transforming closets. There were plenty of closets, but all of them, including the pantry, only had 4 shelves in them. Mr. DIY started with the linen closet in the Master Bathroom. Lucky for us, it was about the same size as our last house, so all of our things fit right in once the adjustable shelves were added.

After the linen closet in the Master Bath, Mr. DIY added some extra shelving in the hall linen closet.


After that, Mr. DIY added shelves to the pantry in the kitchen and transformed a 2nd coat closet into more pantry space.

The organizing continued in the Garage... Since we were downsizing from a large, 3 car garage, to a small 2 car, Mr. DIY added a whole wall of cabinets.


The wire closet in our daughter's room was replaced with a custom closet that I designed and Mr. DIY installed. Our daughter loved it. 

Our new yard is really small compared to our last house and taking care of it has been so easy! Still, I had to plant an herb garden in our front yard. There will definitely be more landscaping projects for our backyard this Spring.

This brings us up to October.

 Phew!

 It's been one project after another!

In October, we hired a company to encapsulate our crawl space, which is tall enough for us to stand up in. Once encapsulated, would be a huge space to store all of our things that we previously stored in our basement. No blog post and no pics yet. Mr. DIY is finishing up the flooring and we still have to organize the containers on the shelving he built in the space. 

Since cold weather was coming up, Mr. DIY built our cat Buddy a cat cave for the Screened Porch because he spends most of his days out there. 

A fun little project I made for the screened porch was the Lighted Grapevine Orb.

Although, we didn't get a chance the first half of the year to do projects at the Mountain Cottage, we were able to do a few projects the 2 weeks we lived there in between house closings and we've been able to spend a few weekends there this Fall. We're looking forward to doing more projects there in the coming months.  We've finished the countertops and installed all of the subway tile. Mr. DIY still has to build open shelves, install crown molding, build a custom wood hood, custom banquette and a custom chandelier. After all of that, we'll be finished in the kitchen.

This brings us up to December, which is all Christmas decorating. We've still been organizing the crawl space and moving things from the garage to the new storage area. We had our 5th and final trailer/pod with all of our storage in it delivered at the end of September and all of that was stored in the garage. We only have a few more things to move and then we'll be able to park 2 cars in the garage! That is something we never had at our last house, even with a big 3 car garage!

I'm looking forward to 2017 with great anticipation.

May your home and family be filled with many blessings!

Pam

Here are all the links to the above projects...


Monday, August 22, 2016

Organizing The Pantries

This isn't a pretty pantry makeover where we spent lots of money.
Let me tell you right now that moving and downsizing, costs a LOT of money.
How many of us have unlimited funds to spend?
We're not raising our hand here at Casa Fanatic. 
This post should be renamed Organizing: Making Use Of What You Have And Spending As Little Money As Possible, but that name was too long.

There are so many projects here to get the place organized, not to mention decorated, so my goal is to get the house to where it works for us without breaking the bank.

Let me show you what the challenge was....
We were trying to get everything in this (pantry continues to the angle on the left and then to the right about 2 feet)
Brian Stogner


To fit into this:

FOUR 12" wire shelves that are 3 feet wide(full depth), then angled on both sides to 54"wide. To make matters worse, the shelves were held up by shelf support brackets that didn't allow for stacking.

When I was complaining mentioning how I have less pantry space than in our last house, Mr. DIY said we had more pantry space at our 966 sq. ft Mountain Cottage!
Yeah, that didn't help.
You can see the Vintage Style Pantry at the Mountain Cottage by clicking HERE.

I was really stressing  as there were about 8 large boxes of pantry items that had been packed from my 7 foot wide pantry with 16" deep shelves.(we also had a corner cabinet - wall and base, that held pantry items) 

Knowing we were going to a 3 foot wide pantry with 12" shelving,  before we moved, I pared down things that I didn't use and that were stored on both  sides of the pantry returns.
You can see how I organized our previous pantry HERE.


Back to our new pantry:
We used the existing wire shelving, and Mr. DIY added 2 more wire shelves that had been taken out of the laundry room. He purchased 2, vertical shelf supports so that items could be stacked. (the shelf supports were $15 each)


First thing I did was utilize the existing storage on the door.

Then, every inch of the angles were used. Command Hooks were used to hang the aprons and plastic grocery bag dispenser. 

These hooks have been a lifesaver in several places around the house. I love that they can be temporary- If I don't like where I've put something, it can be changed without filling holes and touching up with paint.

One good thing about wire shelving is that you can see what's above.


There, it is....Not perfect, but not bad for $30.


Ok, so I didn't get all the 8 boxes of pantry items in the pantry, but I did get all the food and paper goods in.
That left all the small appliances, candles, plastic utensils, baking supplies, cookie cutters, etc left to store.

Mr. DIY had a GREAT idea. There was a 2nd coat closet in the hall just outside the kitchen.

This closet cost a bit more because he purchased adjustable melamine panels and 16" deep shelves. 

 Baking items...


Small appliances...


See through containers of candles, plastic utensils and some other things we really should use up...


I discovered that Mr. DIY added a 12" shelf wayyyyyy up top. After I took the pics, I moved some rarely used items up there, which freed up more space for cookbooks on the shelves.


Lots of adjustable shelves are a beautiful thing!

The two pantries together give me about 83 inches( I count the angled sides of the food pantry as half); which gives me about the same space I had in my pantry at the old house. Now to work on the 6 ft less of cabinets I'm missing in this house!

Is there somewhere in your house that could use more space?

Pam

Monday, August 20, 2012

Keep Your Pantry Organized!

An organized pantry can save you time and money; two very good reasons why you should keep it neat and tidy.


Awhile back Mr. Fanatic made me a couple of shelf stackers and lined a few of the wire shelves with some 1/4" backer board.  It was a no cost project...ya gotta love those! 
Here's how the pantry looked after it was organized back then.

Our pantry has been really unorganized lately and was in need of some help. 

That's an understatement

 It was in need of a lot of help!
 
What I'm about to show you is BAD. 
I mean Horribly bad
Prepare yourself...


There were so many things that weren't on the right shelf I couldn't find a thing. Recently I had to go out and purchase and item I needed. It was very frustrating because I knew the item  was in my pantry. (in fact there were 2 of these items I needed in my messy pantry, but couldn't find them)

Thought I'd be REALLY real and show it to you up close and personal. 
Don't judge.
I spent nearly 4 hours on Saturday clearing the pantry out and organizing it.

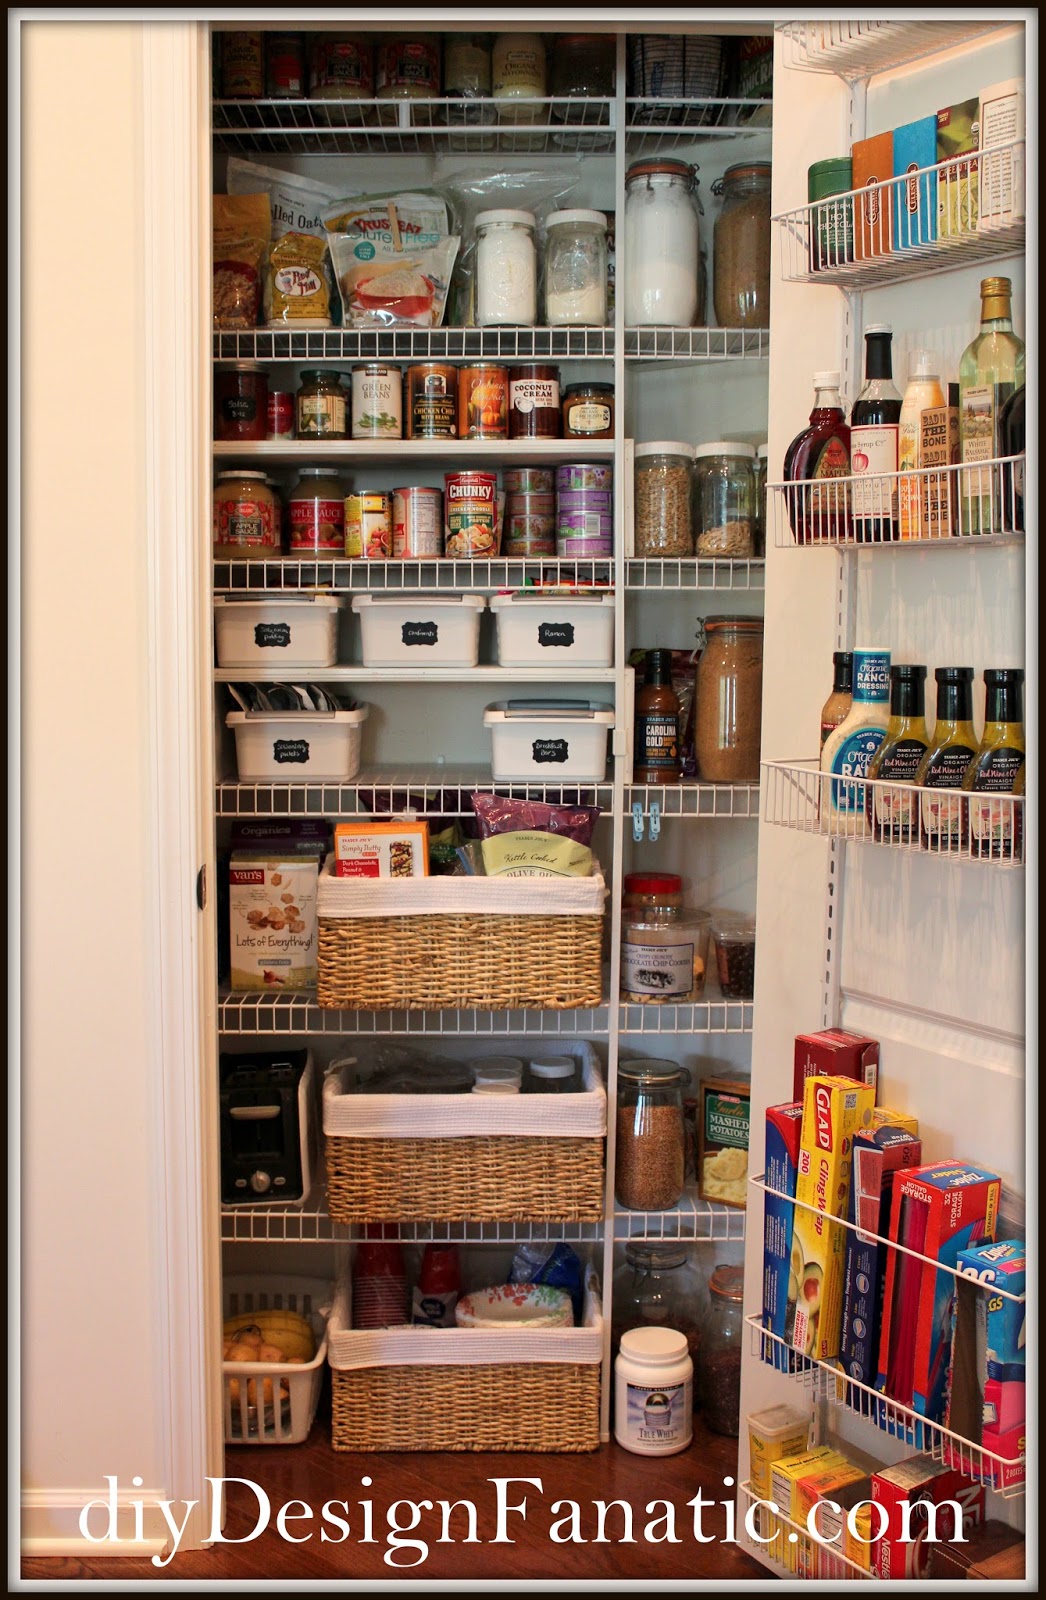
 Here's the pantry after being organized...
Much better, don't ya think?

The first thing you need to do when organizing a space is to clear the whole thing out, but the  space was too overwhelming, so I did one shelf at a time.

I bought six plastic baskets at Walmart awhile back and was going to use them to organize another cabinet, but they didn't work out. I'm so glad I never took them back. I found the large woven baskets at HomeGoods.
pantry organization, diy Design Fanatic, diy, organized pantry

The baskets should keep things a little more contained.
Baskets has sure helped me keep our linen closet neat and organized. 
The large baskets hold snacks, lunch boxes and disposable items.
pantry organization, diy Design Fanatic, diy, organized pantry

pantry organization, diy Design Fanatic, diy, organized pantry

I used my large punch with contact paper to make the labels for the white plastic baskets.
pantry organization, diy Design Fanatic, diy, organized pantry


Uhhhh.


After:
pantry organization, diy Design Fanatic, diy, organized pantry

What one space do you need to clean and organize?


Pam