*this post contains affiliate links
We thought this would be a 2 day weekend project. We were wrong! This is the third weekend working on building some raised beds.
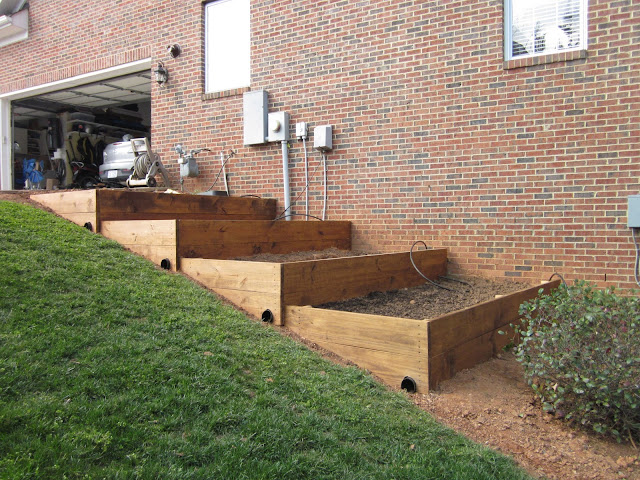
Here's what the South side of our house looked like a few weeks ago.
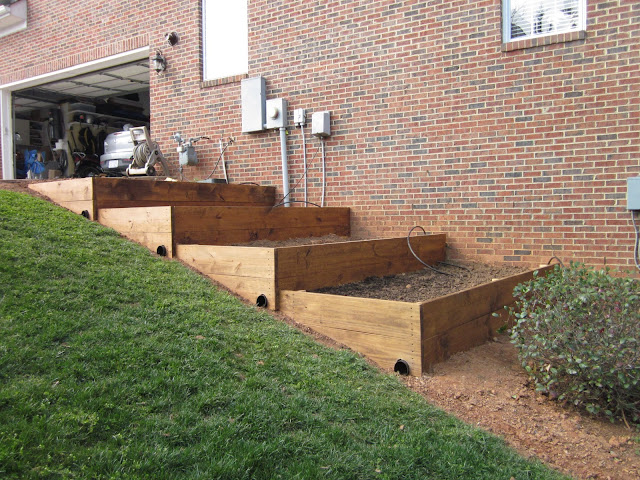
By the second weekend, the boxes were complete.
This weekend, you really can't see much of a difference, but because we are on a hill, drains had to be installed in each box and one that followed along the side of the house. Mr. Fantastic also put some tubing down for irrigation. You can see the drains sticking out of the side of the boxes.
Peach Tree Garden Cart Rolling Work Seat
works great in the flat North Garden
Find it HERE
We were finally able to start filling the boxes with dirt. A thousand pounds only filled the bottom box(about 12") and 1/2 of the dirt needed for the second box.
As always, my cat Buddy is checking things out.
Today, I prepared some dirt in trays so that I can start some seeds in them.
Even though we had gorgeous weather today, the chance for a last frost isn't until mid April. It's so much easier to move the trays in the event of a frost then if they were growing outdoor.
If you'd like to see an update of the
Pam
*this post contains affiliate links, which means I'll make a small commission should you purchase something thru one of these links.
*this post contains affiliate links, which means I'll make a small commission should you purchase something thru one of these links.


What a job Pam! Looks awesome though..really great!
ReplyDeleteI am so impressed Pam. You met the challenge and did a wonderful job. Our yard slopes too. Not easy when landscaping. I can't imagine building raised beds.
ReplyDeleteThat is quite a project you are undertaking! It looks great already! Love your backyard. I can't get over how green your grass is!!
ReplyDeleteJane
Great job, Pam...and a lot of hard work! I wish you the best on starting a wonderful garden!
ReplyDeleteXO,
Jane
You're making such great progress! Looking good!! It's going to be such a perfect place for your garden.
ReplyDeletePam
Pam your hard work paid off,it looks great already! Can't wait to see it all done. Martina
ReplyDeleteWhat a lot of work! I can just imagine how gorgeous they will be filled with plants and spring flowers!
ReplyDeleteWow, y'all have been working hard. That is going to look great. Projects have a funny way of taking longer than we think.
ReplyDeleteHi Pam...
ReplyDeleteIt is very effort full project and I am sure the sweet fruit of your hard work blooms soon
http://craftaworld.blogspot.com/
Love
Farah
I'm so happy that I found this post! Your raised beds look great! You have done exactly what we hope to do! We live in a very similar environment...a slope in the forest. Your yard is amazing!!!
ReplyDeleteGreat blog!
Deb
Wow, it looks wonderful!!! What a difference.
ReplyDeleteI have a concern about your brick walls. I am concerned about the brick and dirt against the walls creating moisture against the brick. You can resolve that by either putting piece of exteral plywood on the sides of each bed facing the wall or you can move the dirt and put black tar paper against the brick wall then the dirt. The plywood would be the best.
ReplyDeleteWhat a project! It is looking wonderful though and I can just picture it all filled in with flowers and such. Your entire yard is just gorgeous really! :-)
ReplyDeleteVanessa
Thanks for the comments everyone! @ Linda; We kept the dirt level the first 12 "at the top of each box the same level it was before. We also have a drainage pipe along the side of the house and a drainage tray(holds more than the pipe) in each box at the bottom, draining away from the house. there is a 4" thick concrete wall behind the brick which make up the basement walls. If there is any moisture, we should see it inside the basement since that part is unfinished. The black tar paper is a good idea, though!
ReplyDeleteDon't the utility people need to access the meters on the side of your house each month? I'm curious, because I could never plant anything that blocked utility meters at my house.
ReplyDeleteJackie, Our utilities are read at the curb wirelessly, but we will leave a foot or so along the house in the top 2 boxes in case we need access to the electric panel. When the large shrubs were there, we kept it trimmed back about 18". All good things to think about!
ReplyDeleteYour hubby has really done a great job. I know it must be a lot of work but the reaping will be soooo worth it.
ReplyDeleteLandscaping takes SO much work! Well done though!
ReplyDelete-Polly
http://learnandgopollyco.blogspot.com
Great job!! Raised beds are such an excellent way to garden and they always looks nice. I'd love to see what they look like once they're planted!
ReplyDeleteIt is going to look really good when you get it finished. Since we are in a new house (again) we have to start from scratch and I am not much motivated. That's not good! lol!
ReplyDeleteIt's going to be really nice when y'all finish. Landscaping always takes more time than I anticipate!
ReplyDeleteBeautiful! Would you be willing to share the plans and directions for creating these awesome terraced planter boxes? I need to do something like this, since the only place I have to plant is on a slope on the side of my home and our soil (if you can call it that) is really nothing but rocks and boulders. I've seen other examples, but yours seems to be the most thorough, including drainage, example I've seen.
ReplyDeleteDid you build them as 4'x8' boxes? What size boards did you use? 2"x10"?
ReplyDeleteThe boxes are 4' x 10' and made from 2 x 8s
DeleteHow far down in the ground are those posts anchored? Did you first put concrete in the holes, add rocks to the post holes or just put the posts right into the ground? How far down into the ground are the bottom boards of each box? Did you dig a small trench and sink part of the bottom boards and use any drainage rocks? Also, are those drains just round tubing with holes poked in to allow water to drain? Thanks, and it looks great!
ReplyDeleteThe posts go into the ground about 10-12 inches. The bottom boards are just set to as close to level as possible.The bottom side is about a couple of inches. They can be set on the dirt as long as the boxes are level. We didn't dig a trench for the boards, we added the fill dirt on top. The drains are round tubing with holes in it - they are available with and without holes at Lowes or Home Depot. We didn't use gravel, we used a woven plastic liner on top so that the dirt wouldn't fill up the tube.
DeleteExcellent, thank you very much! And this design has worked well over the past few years since the project was completed? Any issues with erosion?
DeleteTT, Our terraced raised beds have worked very well the past few years and didn't incur any erosion on the hill. We did have one box bow out a little, but we added a couple more short stakes to give it some support. We are planning to put our house on the market in 6 weeks and took the beds out a few months ago since a few of the boards needed to be replaced anyway and people looking for houses in our neighborhood don't appreciate vegetable gardens. Cedar boards will last longer, but the cost is a lot more.
DeleteDo you have a picture of what they look like planted?
ReplyDeleteYou can find photos of the beds with veggies in them here http://www.diydesignfanatic.com/2012/05/raised-bed-update.html
Delete